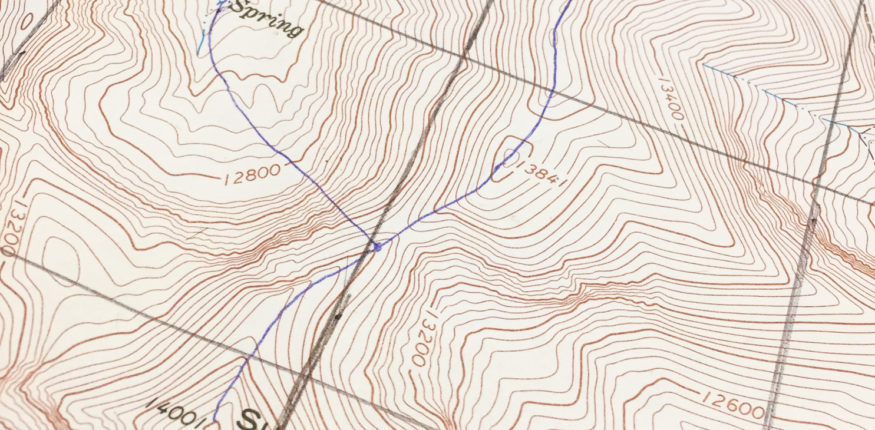
When I was a kid, I was infatuated with topo maps. My generation was on the cusp of the mapping technology: before I went to college, the only source for maps for adventure planning were paper copies from the USGS (US geological survey). I fondly recall ordering from the USGS (via mail!) their catalog of topo maps for the area where I grew up. Then I purchased, for $4, also via mail, the “7.5 minute topo quad” for the farm where I grew up (so-called because the map covers 7.5 minutes-worth of latitude and longitude). I remember thinking that $4 was an incredible deal for such a beautiful and valuable item (they are still only $8 apiece now, on the USGS site).
Topo is short for “topographical.” A topo map provides information regarding the ups and downs of the landscape. The distinguishing feature of topo maps are contour lines, which encode the elevation of the landscape. Contour lines are a way to project a three-dimensional world—mountains!—onto a two-dimensional piece of paper. If you’re proficient at “reading” a topo map, you can “see” the mountains and the valleys, identify which way streams run and where the cliffs are located. A contour line marks out a path on the landscape that follows an equal elevation. If you were to walk along a contour line, you would be walking a flat path, neither uphill or downhill. The lines are spaced apart by a fixed interval of elevation—say, for example, 200 feet of elevation gain. Therefore, when the contour lines are spaced closely together on the map, they indicate a steep spot.
If you need additional adult education, before teaching your kids, I recommend the “Land Navigation Handbook” Sierra Club Guide. It may be old, but topo-map reading skills haven’t changed over the years. This is the book I used to teach myself (it is still on my shelf), and I found it to be excellent.
When my boys got excited about maps, I took the opportunity to do a simple project to introduce them to topo maps. My goal was to teach the meaning of contour lines to the boys, with Playdough and paper. I formed the playdough into a “mountain”. Then I carved out contour lines on the Playdough mountain. Then I translated those contour lines to a piece of paper. The pictures below will explain my process (click to view the full image gallery).
To the boys, I pointed to features on the “mountain”, and the corresponding features on the paper, and tried to use my Jedi mind force skills to get my boys to see the connection. I suspect it might have been better received if I was teaching older boys—Bodie and Jasper were 6 and 4 at the time—but I felt that it was a solid attempt anyway. I intend to repeat the exercise again this year, maybe also next year, etc. Nevertheless it was a successful exercise, and in my often un-humble opinion I think it’s a great way to introduce the kids to contour lines.
After going through the playdough exercise, it’s time to apply the skills to an actual topo map. These days, it’s very easy to find topo maps online through a simple google search. I would point you in the direction of Cal Topo for a quick and easy way to lay eyes on contour lines.
Study whatever features on the map that most excite your kids. You can have them try to identify peaks. Make a game out of finding the highest one (the summit elevation for the highest peaks is usually noted). Try to identify the steepest way off the mountain, and conversely the ridgeline that you might use to most easily ascend the mountain. You can point to lakes and houses, you can plan a route from one spot to another. Find the forests and the open areas, check out the streams (and use the topo map to figure out which way they flow—the contour lines form “v” shapes
at a stream, and the point of the “v” points upstream).
I can’t speak for all kids, but my boys have developed a certain excitement for maps that I take every opportunity to encourage.
(Karen has just informed me that, apparently, she needs to do the playdough exercise, too…)


